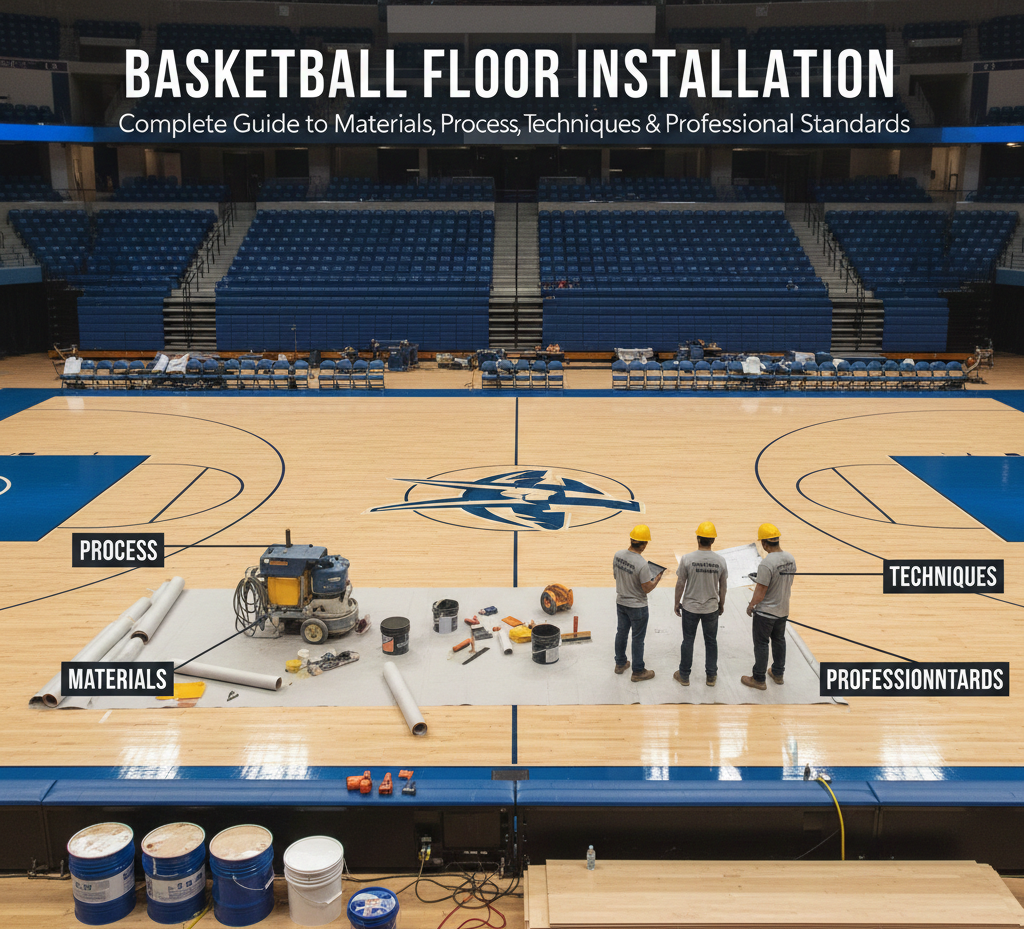
Basketball floor installation is the backbone of a high-performance court. More than just a surface, a professionally installed basketball floor determines ball bounce accuracy, player safety, traction, shock absorption, and long-term durability. Whether the project involves a school gymnasium, sports academy, indoor stadium, commercial sports complex, or residential basketball court, the installation process must meet strict technical and performance standards.
A poorly installed floor can lead to uneven play, frequent repairs, injury risks, and premature surface failure. In contrast, expert basketball floor installation delivers consistent gameplay, professional aesthetics, and years of reliable performance.
This complete guide explains everything you need to know about basketball floor installation — including flooring types, preparation requirements, installation methods, finishing processes, maintenance tips, and professional best practices.
What Is Basketball Floor Installation?
Basketball floor installation is a structured, multi-step process that includes surface preparation, subfloor construction, flooring application, finishing, line marking, and performance testing. Each step is critical and varies depending on whether the court is indoor or outdoor and which flooring system is selected.
Professional basketball flooring systems are engineered to:
-
Absorb player impact
-
Provide controlled grip
-
Ensure uniform ball bounce
-
Withstand heavy foot traffic
-
Maintain long-term surface integrity
Types of Basketball Flooring Used in Installation
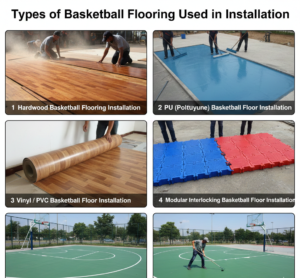
Choosing the correct flooring system is the first and most important step in basketball floor installation. Each material serves a specific purpose and requires a specialized installation technique.
1. Hardwood Basketball Flooring Installation
Hardwood basketball flooring, typically made from maple wood, is the gold standard for professional indoor courts.
Key features:
-
Used in NBA, FIBA, and international arenas
-
Excellent ball bounce and traction
-
Premium appearance
-
Requires advanced subfloor systems
Installation method includes:
-
Moisture barrier installation
-
Shock-absorbent subfloor construction
-
Precision plank alignment
-
Sanding, sealing, and polyurethane coating
2. PU (Polyurethane) Basketball Floor Installation
PU basketball flooring is a seamless, cushioned surface commonly used in schools, academies, and indoor stadiums.
Advantages:
-
High shock absorption
-
Joint-free surface
-
Excellent slip resistance
-
Easy maintenance
PU flooring is installed in multiple liquid layers, creating a durable and elastic playing surface.
3. Vinyl / PVC Basketball Floor Installation
Vinyl or PVC sports flooring is a cost-effective indoor solution suitable for multi-purpose halls.
Benefits:
-
Multi-layer comfort system
-
Quick installation
-
Good durability
-
Ideal for educational institutions
Vinyl floors are installed using adhesive bonding and seam welding for a smooth finish.
4. Modular Interlocking Basketball Floor Installation
Modular sports tiles are increasingly popular for both indoor and outdoor courts.
Key benefits:
-
Fast installation without adhesives
-
Weather-resistant
-
Easy replacement and portability
-
Excellent drainage for outdoor use
Tiles are snapped together using locking systems, making installation quick and efficient.
5. Acrylic Basketball Floor Installation (Outdoor)
Acrylic flooring is widely used for outdoor basketball courts.
Advantages:
-
UV-resistant
-
Anti-skid surface
-
Weatherproof
-
Cost-effective
Acrylic basketball floor installation involves multiple coating layers over a concrete or asphalt base.
Step-by-Step Basketball Floor Installation Process
1. Site Inspection and Base Evaluation
Professional basketball floor installation always begins with a detailed site inspection. Installers assess:
-
Base strength and flatness
-
Cracks or surface damage
-
Moisture content
-
Drainage slope (outdoor courts)
-
Load-bearing capacity
A stable and level base is essential for long-lasting performance.
2. Subfloor Construction (Indoor Courts)
For indoor basketball floor installation, a subfloor system is critical.
Common subfloor components include:
-
Rubber shock pads
-
Plywood or engineered panels
-
Floating subfloor systems
-
Moisture-resistant underlays
The subfloor absorbs impact, reduces injury risk, and enhances comfort.
3. Moisture Barrier Installation
Moisture is the biggest enemy of indoor basketball flooring. A vapor barrier protects the floor from:
-
Warping
-
Swelling
-
Mold growth
-
Adhesive failure
Moisture testing is conducted before proceeding.
4. Primary Flooring Installation
Hardwood Basketball Floor Installation
-
Wood planks are acclimatized to room conditions
-
Boards are installed using tongue-and-groove systems
-
Expansion gaps are maintained
-
Mechanical nailing or adhesives secure the planks
Precision is critical to prevent movement and surface distortion.
PU Basketball Floor Installation
-
Primer coat applied
-
Cushioning layer installed
-
Self-leveling PU layers added
-
Top wear-resistant coat applied
-
Curing time observed
This results in a seamless professional sports surface.
Vinyl / PVC Floor Installation
-
Base is cleaned and primed
-
Adhesive applied uniformly
-
Sheets or planks laid carefully
-
Seams welded or sealed
Modular Tile Installation
-
Surface cleaned and leveled
-
Tiles snapped together
-
Edge ramps installed
-
No curing or adhesives required
Acrylic Outdoor Floor Installation
-
Concrete surface repaired
-
Primer coat applied
-
Cushion layers added
-
Color coats applied
-
Anti-slip texture finished
5. Sanding, Polishing & Finishing (Wood Floors)
Hardwood basketball floor installation includes finishing steps:
-
Machine sanding
-
Surface sealing
-
2–3 layers of sports-grade polyurethane
-
Gloss or matte finish selection
This process protects the wood and enhances visual appeal.
6. Line Marking and Court Branding
Accurate line marking is essential for professional gameplay.
Lines include:
-
Center circle
-
Free-throw lanes
-
Three-point arc
-
Sidelines and baselines
Custom logos, team branding, and color themes can be added.
7. Quality Inspection and Performance Testing
Professional installers test:
-
Flatness and level
-
Traction coefficient
-
Shock absorption
-
Ball rebound consistency
-
Seam integrity
Only after passing these checks is the court approved for use.
Key Factors Affecting Basketball Floor Installation
-
Climate and humidity conditions
-
Base quality and leveling
-
Flooring material selection
-
Installer expertise and certification
-
Indoor vs outdoor usage
-
Expected foot traffic and play intensity
Benefits of Professional Basketball Floor Installation
-
Accurate and consistent ball bounce
-
Improved player safety
-
Reduced injury risk
-
Long-term durability
-
Professional-grade appearance
-
Low maintenance costs
-
Higher facility value
Maintenance After Basketball Floor Installation
Proper care ensures long-term performance:
-
Daily dry mopping
-
Avoid water accumulation
-
Use non-marking shoes
-
Recoat wood floors every 2–3 years
-
Inspect modular tiles annually
-
Maintain indoor humidity levels
Frequently Asked Questions (FAQ) – Basketball Floor Installation
1. What is basketball floor installation?
Basketball floor installation involves laying a durable sports flooring system with proper surface, cushioning, and court markings for indoor or outdoor basketball courts.
2. What types of flooring are used for basketball courts?
Common flooring types include:
-
Synthetic Acrylic Flooring
-
PU (Polyurethane) Flooring
-
Rubber Flooring
-
Wooden Sports Flooring
3. How long does basketball floor installation take?
Installation time depends on court size and flooring type. Typically, it takes 7–14 days for a standard indoor court, including surface preparation and curing.
4. Do you provide court markings and line painting?
Yes, professional basketball floor installation includes accurate court markings and line painting as per official standards (FIBA/NBA).
5. Is basketball flooring suitable for indoor and outdoor courts?
Yes. Synthetic acrylic and rubber flooring are best for outdoor courts, while wooden and PU flooring are ideal for indoor courts.
6. What is the cost of basketball floor installation?
The cost varies based on flooring type, court size, and project scope. We provide customized quotes based on your requirements.
7. How durable is basketball flooring?
High-quality basketball flooring can last 8–15 years with proper maintenance and usage, depending on the material and wear.
8. Can you install basketball flooring in schools and clubs?
Yes, we install basketball flooring for schools, colleges, sports clubs, academies, and stadiums.
9. Do you offer maintenance services after installation?
Yes, we offer maintenance services like cleaning, repainting lines, and repairing damaged areas to ensure long-lasting performance.
10. How do I get a basketball floor installation quote?
You can contact us with your court dimensions and preferred flooring type. Our team will provide a detailed quote and project timeline.
Conclusion
Basketball floor installation is a technical process that directly impacts gameplay quality, athlete safety, and facility longevity. From selecting the right flooring system to executing precise installation and finishing, every step matters. Whether installing hardwood, PU, vinyl, modular tiles, or acrylic surfaces, professional installation ensures a world-class basketball court.